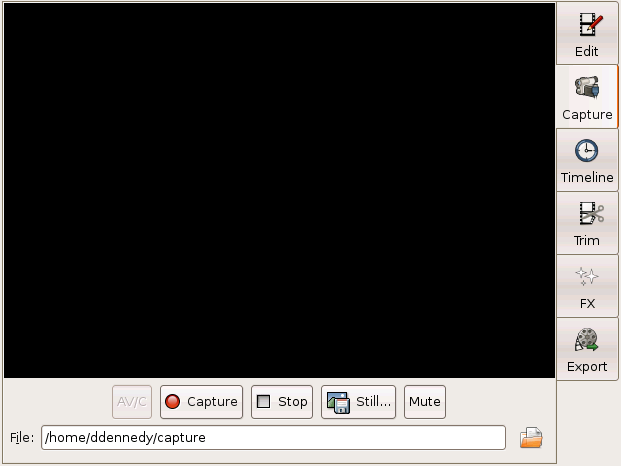
Kino can capture from a DV device over IEEE 1394, also known as FireWire or iLink. The most popular form of DV device is a MiniDV camcorder. but it could be a VTR, analog converter, or other. Kino does not support capturing of DVCPRO50, DVCPROHD, or HDV. Neither does it support Video4Linux or USB for a capture interface. If you can only use Video4Linux on your system, we recommend using another program to capture from V4L, and then let Kino import the file.
Before attempting to capture video, it is good to understand the Linux IEEE 1394 and Kino configuration. Linux IEEE 1394 configuration can be tricky due to changes in the kernel interfaces and various distributions' default support for setup of the device files. Next, it is good to understand that there are three concepts to understand: device discovery, device control, and DV capture.
![[Caution]](images/caution.png) |
Caution |
|---|---|
The dv1394 kernel interface is deprecated in Kino, but it is still offered as a build-time configure option for legacy transition. |
Kino prefers the raw1394 kernel module interface. Nearly all kernel versions load the raw1394 module when you plug in and DV device and turn it on. With raw1394, device discovery, device control, and DV capture are seamless! Since the raw1394 device file is a well established standard at /dev/raw1394, there is no need to configure it. You just need to make sure your user account has read and write access to /dev/raw1394. With raw1394, if your system has more than one IEEE 1394 interface, Kino discovers your DV device regardless of which interface your device is plugged into. If you have more than one DV device, then choose ->-> and use the AV/C Device option menu to choose the device. Kino attempts to read the name of the device, but displays the devices universally unique identifier in Base64 when a name is not available.
To determine which kernel module your version of Kino is using for DV Capture choose ->-> . If there is a dv1394 device field, then it is using dv1394 and not raw1394 for DV capture.
![[Note]](images/note.png) |
About dv1394 (skip if not relevant) |
|---|---|
dv1394 does not offer any device control , and Kino does not fully support device discovery when using dv1394. However, when configured to use dv1394 for DV capture , Kino still tries to use raw1394 for device control. In other words, Kino can still use raw1394 for device control to supplement dv1394. However, without raw1394 and lacking device control, one can still manually control the device using its physical buttons. With dv1394, it is important to ensure the kernel module is loaded (using lsmod and modprobe, if not loaded). Some kernel versions automatically load dv1394 when a DV device is plugged in and turned on. Next, you need to locate the device file under /dev. It might be /dev/dv1394-N, /dev/dv1394/N, or under /dev/ieee1394/dv/hostN/.... If you have only one IEEE 1394 interface, then N = 0; otherwise, there are multiple-numbered files--one for each interface (host). If you have more than one interface, it can be tricky to determine into which one your DV device is plugged. This is how dv1394 makes full support for device discovery difficult. If you can not find a file under /dev corresponding to dv1394, then you must create it manually . Next, you must make sure that your user account has read and write access to the dv1394 device files. Finally, you must enter the correct device file name in Kino by choosing ->->-> . |
Kino offers a lot of options for the capture file by choosing ->-> . See Section 4.2, “Capture” for more information.

In the Capture page, click AV/C to turn on device control. AV/C refers to Audio/Video Control. Then, the Kino transport ( Section 2.12, “Transport Controls” ) controls send the control commands to the device. They also reflect the state of the device's transport if it changes or you manually control it using the device's buttons. The seek-to-begin- or seek-to-end-of-movie buttons do a fast, non-previewing rewind or fast forward, respectively. The rewind and fast forward buttons do a preview/scanning form of rewind or fast forward. The preview and next scene buttons use a special feature of the camera called "index" points. Depending upon how you configure the camera, it sets an index point for each each new day of recording or other criteria. The play, pause, and stop transport controls are obvious. You can even step frame-by-frame. Support for the variable-speeds of the shuttle control depends upon the device's support for that feature also known as trick play.
During preview, click Still... to grab a single still frame and save it in a number of formats: PPM, JPEG, PNG, TIFF, GIF, BMP, TGA, and whatever other gdk-pixbuf modules are on your system.
Click Capture to start the capture to file. You can preview during capture by choosing ->-> and clicking Enable preview during capture . As each file is captured according to the file-splitting options in ->-> , Kino adds the clip to the Storyboard. Click Stop to stop capturing to file and add the clip to the Storyboard. When Kino adds each clip to the Storyboard, it performs AutoSplit ( Section 2.7, “AutoSplit” ) to automatically create scenes on the Storyboard. As scenes appear in the Storyboard, feel free to add metadata ( Chapter 12, Metadata ).